 Save
Save The first time I made tortilla pizza wraps was during a power outage when we couldn't use the oven. Huddled around our gas stove with flashlights, I improvised with tortillas and leftover pizza ingredients from the fridge. The crispy exterior and melty cheese interior was such a hit that my daughter proclaimed it better than our usual Friday night pizza. Now it's become our spontaneous lunch solution when we want something quick but satisfying.
Last summer, I packed these for a lakeside picnic, wrapping them in foil while still warm. When we arrived and unwrapped them, the delighted expressions on my friends faces as they bit into the still-crispy exterior was priceless. Someone asked if I had brought a portable toaster, and we all laughed when I revealed the simple skillet method. They disappeared so quickly I wished I had made twice as many.
Ingredients
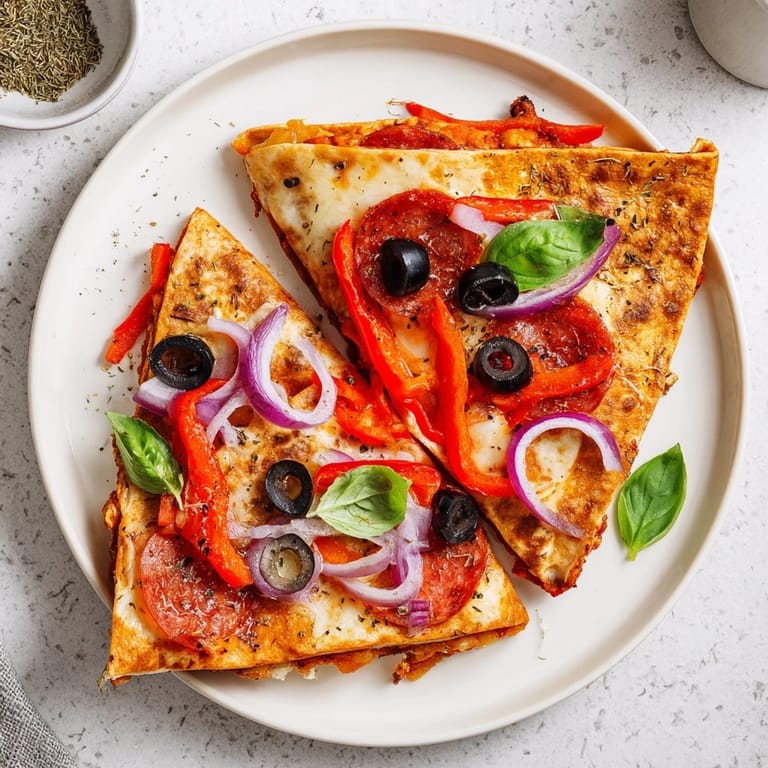
- Large flour tortillas: The 10-inch size creates the perfect balance between enough surface area for toppings and the right thickness when folded.
- Pizza sauce: A thin layer works best - too much will make your wrap soggy and difficult to handle during cooking.
- Mozzarella cheese: I find pre-shredded works perfectly fine here, though freshly grated provides a slightly meltier texture.
- Toppings: The beauty is in the customization - pepperoni creates classic pizza flavor, while vegetables add freshness and texture.
- Dried oregano: This humble herb somehow magnifies the pizza experience, making even the simplest ingredients taste more authentic.
Tired of Takeout? 🥡
Get 10 meals you can make faster than delivery arrives. Seriously.
One email. No spam. Unsubscribe anytime.
Instructions
- Prep your tortilla:
- Place your tortilla on a flat surface and make a single cut from the center to the edge. This single slice is the secret to creating the fold pattern.
- Add your sauce base:
- Spread pizza sauce in a thin, even layer across the entire surface, leaving just a small border around the edge. The border prevents messy overflow when cooking.
- Layer your cheese:
- Distribute mozzarella evenly across the entire tortilla. This creates the glue that will hold everything together when melted.
- Arrange toppings strategically:
- Place toppings in distinct quarters rather than mixing them together. This creates flavor zones that make each bite slightly different from the last.
- Master the fold technique:
- Starting from the cut line, fold each quarter over the next in sequence. The result should look like a layered triangle with the toppings tucked inside.
- Cook until golden:
- Place the wrap seam-side down first to seal it shut as it cooks. Listen for the gentle sizzle that tells you its crisping properly.
 Save
Save When my teenage nephew visited during a particularly difficult time in his life, he barely spoke to anyone. One afternoon, I invited him to help make these tortilla pizzas, showing him how to arrange the ingredients in quarters before the fold. As we cooked side by side, he gradually opened up, suggesting topping combinations and even laughing when his first attempt folded awkwardly. By dinner, the atmosphere had completely shifted, and these simple wraps had somehow bridged a gap words couldnt.
Topping Combinations to Try
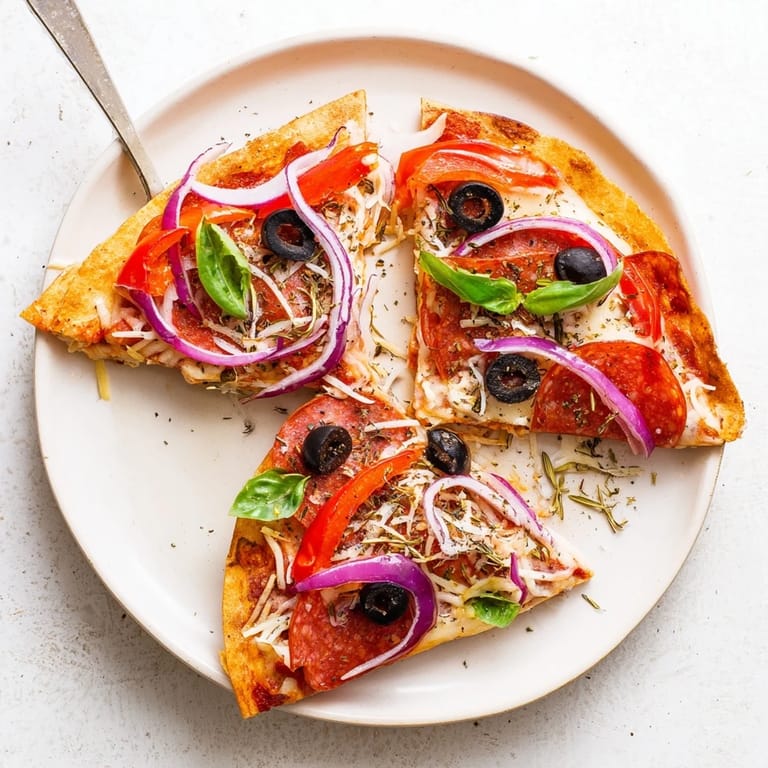
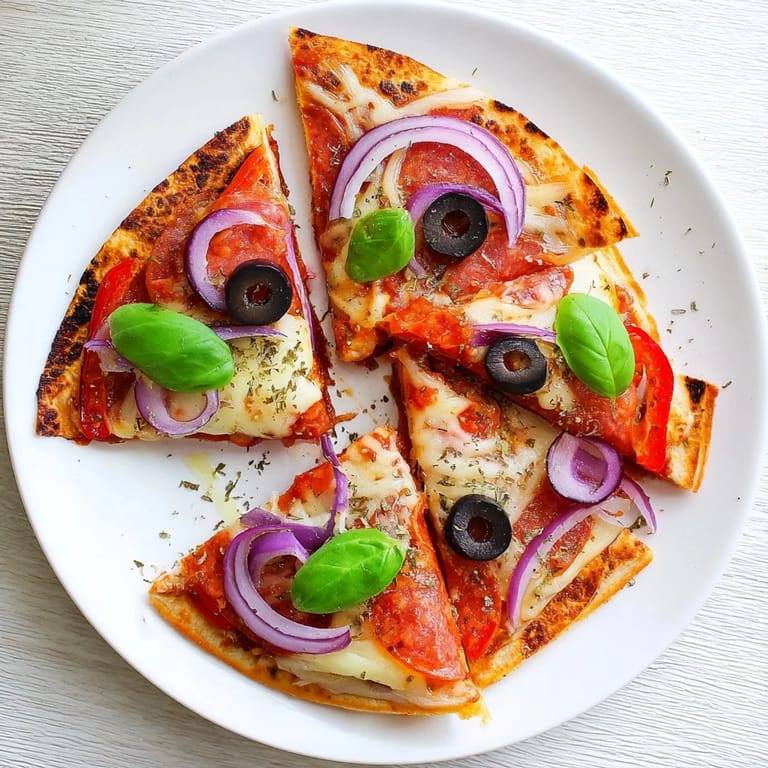
After dozens of experiments, Ive found that limiting yourself to 3-4 toppings yields the best results. More than that and the tortilla becomes too heavy to properly crisp and the flavors compete rather than complement. My personal favorite is a simple combination of mozzarella, thinly sliced fresh tomato, basil added after cooking, and a sprinkle of red pepper flakes for subtle heat.
Make-Ahead Tips
You can prepare these wraps up to the folding stage and store them in the refrigerator for up to 8 hours before cooking. Simply place them on a plate with the seam side down and cover with plastic wrap. This is particularly useful when preparing for a group, as you can cook them in quick succession right before serving, ensuring everyone gets a hot, crispy wrap.
Serving Suggestions
The portable nature of these wraps makes them perfect for casual dining situations where traditional pizza would be impractical. We often serve them with small dipping bowls of extra marinara sauce, ranch dressing, or even hot honey for an unexpected sweet-spicy kick.
- A simple arugula salad with lemon vinaigrette balances the richness of the cheesy wrap.
- For a complete meal, pair with a cup of tomato soup for the ultimate comfort food experience.
- Cut into smaller triangles and secure with toothpicks for an unexpected party appetizer that wont leave crumbs on your carpet.
 Save
Save These tortilla pizza wraps have saved countless hectic weeknights in our home, transforming what could have been a takeout evening into something more personal and satisfying. Theyre proof that sometimes the simplest kitchen improvisations become the most beloved recipes.
Common Recipe Questions
- → Can I prepare these wraps in advance?
Yes, you can assemble the folded tortillas up to 2 hours ahead. Keep them covered in the refrigerator, then pan-toast just before serving. The cooking time may increase by 1-2 minutes if starting from cold.
- → What are some topping alternatives?
Try mushrooms, spinach, sun-dried tomatoes, caramelized onions, or cooked chicken for protein variations. You can also use different cheeses like provolone or fontina. Keep the total topping amount balanced to prevent overstuffing.
- → How do I prevent the tortilla from tearing when folding?
Use large flour tortillas at least 25cm in diameter. Ensure they're fresh and pliable. The single center cut helps create clean fold lines. If the tortilla feels dry, warm it slightly in a skillet first.
- → Can I bake these instead of pan-toasting?
Yes, place folded wraps on a parchment-lined baking sheet and bake at 200°C (400°F) for 10-12 minutes until golden. Brush with a light coating of olive oil beforehand for better crispiness.
- → What's the best way to serve this dish?
Serve immediately while warm and cheese is melted. Slice in half for easier handling. Pair with a fresh side salad, marinara sauce for dipping, or a simple arugula salad with lemon vinaigrette.
- → Is this suitable for meal prep?
These are best enjoyed fresh, but assembled wraps can be refrigerated for up to 24 hours. Reheat in a skillet for 2-3 minutes to restore crispiness rather than using a microwave.