 Save
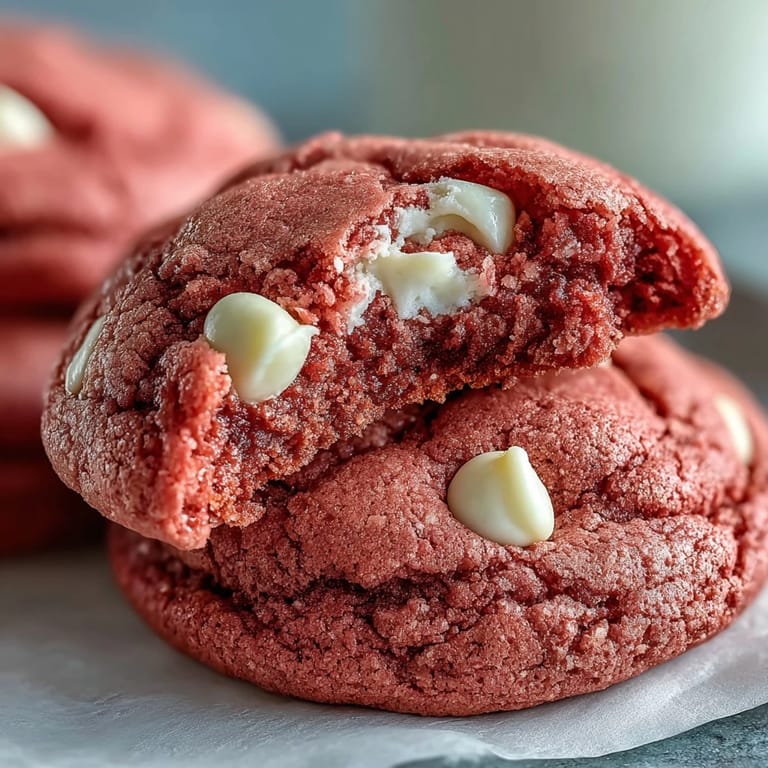
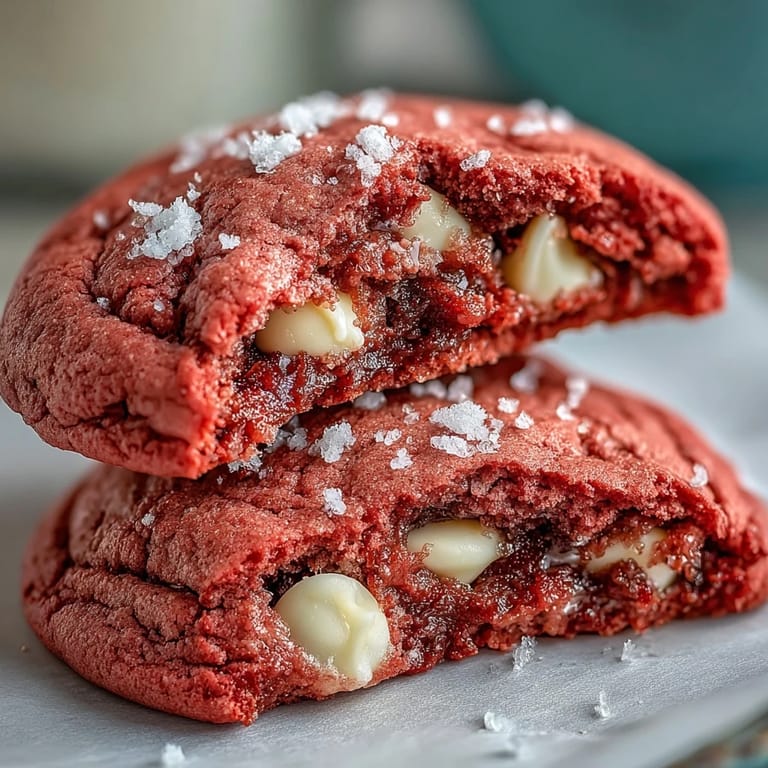
Save My daughter walked into the kitchen one Saturday morning and announced she wanted pink cookies for her birthday party. Not strawberry, not raspberry—just pink. I laughed, pulled out my favorite sugar cookie base, and grabbed the gel food coloring I usually save for frosting. What started as a whim turned into the most requested cookie in our house. The soft, chewy texture paired with creamy white chocolate chips made everyone forget these started as a color experiment.
I brought a tin of these to a potluck once, and three people asked if I used cake mix. Nope—just butter, sugar, and a good amount of creaming time to get that fluffy texture. The pink threw everyone off because it looked so bakery-perfect. One friend admitted she took two extras and hid them in her purse. I considered that the highest compliment.
Ingredients
- All-purpose flour: The backbone of the cookie, giving structure without making them cakey; spoon it into your measuring cup and level it off so you dont pack in too much.
- Baking powder and baking soda: This combo gives lift and that perfect chewy-soft center; dont skip either one or the texture falls flat.
- Salt: Just half a teaspoon balances all the sweetness and makes the butter flavor shine.
- Unsalted butter: Softened to room temperature so it whips up light and fluffy; if its too cold, youll end up with dense cookies.
- Granulated sugar: Creaming this with the butter creates tiny air pockets that make the cookies tender.
- Egg: Adds moisture and binds everything together; one large egg is all you need.
- Vanilla extract: Pure extract makes a noticeable difference here, bringing warmth to every bite.
- Pink gel food coloring: Gel works better than liquid because it wont thin out your dough; start with less and add more until you love the shade.
- White chocolate chips: They melt slightly in the oven and create little pockets of creamy sweetness.
Tired of Takeout? 🥡
Get 10 meals you can make faster than delivery arrives. Seriously.
One email. No spam. Unsubscribe anytime.
Instructions
- Whisk the dry ingredients:
- Combine flour, baking powder, baking soda, and salt in a medium bowl, whisking until no clumps remain. This ensures even distribution so you dont get pockets of leavening.
- Cream butter and sugar:
- Beat softened butter and sugar on medium-high speed for 2 to 3 minutes until the mixture looks pale and fluffy like frosting. This step is where the magic happens, creating that melt-in-your-mouth texture.
- Add egg, vanilla, and color:
- Mix in the egg and vanilla until smooth, then add the pink gel food coloring. Keep mixing until the color is evenly distributed with no streaks.
- Combine wet and dry:
- Pour the dry ingredients into the wet mixture and mix on low speed just until no flour pockets are visible. Overmixing here makes tough cookies, so stop as soon as it comes together.
- Fold in white chocolate chips:
- Use a spatula to gently fold in the chips, making sure theyre spread throughout the dough. I always sneak a few extra on top of each scoop before baking.
- Chill the dough:
- Cover the bowl with plastic wrap and refrigerate for 30 minutes. This firms up the butter so the cookies bake up thick instead of spreading thin and crispy.
- Preheat and prep:
- Set your oven to 350°F and line two baking sheets with parchment paper. Parchment prevents sticking and makes cleanup a breeze.
- Scoop and space:
- Use a tablespoon or cookie scoop to portion out dough balls, placing them 2 inches apart on the sheets. They will spread a bit, so give them room to breathe.
- Bake until just set:
- Bake for 10 to 12 minutes, pulling them out when the edges look set but the centers still seem soft. They might look underdone, but theyll firm up as they cool and stay chewy inside.
- Cool properly:
- Let cookies sit on the baking sheet for 5 minutes to finish setting, then move them to a wire rack. This prevents soggy bottoms and keeps them perfectly textured.
 Save
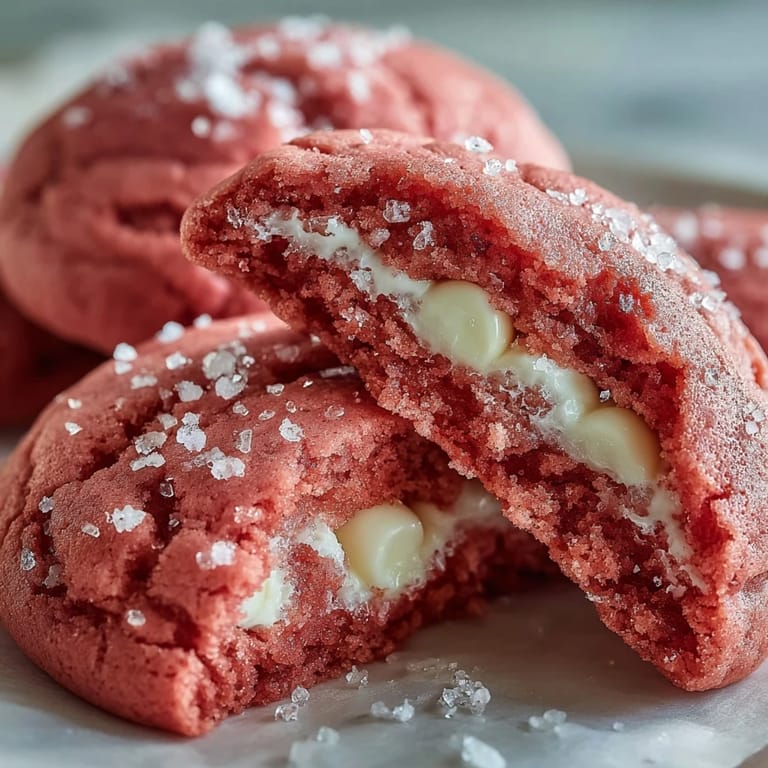
Save The first batch I made, I forgot to chill the dough because I was impatient. They came out thin and crispy, nothing like what I wanted. My husband still ate them all, but I knew I could do better. That second attempt, with properly chilled dough, came out pillowy and perfect. Now I never skip that step, even when my kids are hovering by the oven asking when theyll be ready.
Customizing Your Pink Velvet Cookies
I love adding a few drops of almond extract for a subtle bakery flavor that makes people wonder what the secret ingredient is. Rose water also works beautifully if you want something a little more elegant and floral. If youre making these for a party, press a few extra white chocolate chips on top of each dough ball before baking so they look extra pretty. For holidays, swap the pink for red, green, or even pastel colors to match the season.
Storage and Make-Ahead Tips
These cookies stay soft in an airtight container for up to a week, though theyve never lasted that long in my house. You can freeze the dough balls on a tray, then transfer them to a freezer bag and bake straight from frozen, adding an extra minute or two to the baking time. Baked cookies also freeze well for up to three months; just thaw them at room temperature and theyll taste freshly baked. I like to keep a stash of frozen dough for those moments when unexpected guests show up or I need a quick dessert.
Serving Suggestions and Fun Twists
These cookies are perfect on their own with a cold glass of milk, but Ive also made cookie sandwiches by spreading cream cheese frosting between two cooled cookies. They look stunning on a dessert table next to vanilla cupcakes or brownies. One time I crumbled a few over vanilla ice cream and it tasted like a fancy sundae. You can also package them in clear bags tied with ribbon for gifts that actually get eaten instead of stashed in a cupboard.
- Add a pinch of sea salt on top right after baking for a sweet and salty twist.
- Use different colored gel to match any party theme or holiday.
- Try dark chocolate chips instead of white for a bolder contrast.
 Save
Save Every time I pull a tray of these out of the oven, the kitchen smells like butter and vanilla, and someone always appears asking if they can have one warm. Thats the real magic of baking—turning simple ingredients into something that brings people together, even if its just for a few minutes around the counter.
Common Recipe Questions
- → Can I make these cookies without food coloring?
Yes, you can omit the pink gel food coloring entirely. The cookies will still taste delicious, just with a classic vanilla cookie appearance instead of the vibrant pink hue.
- → Why do I need to chill the dough?
Chilling the dough for 30 minutes helps the cookies hold their shape during baking and prevents them from spreading too much. It also enhances the texture, making them softer and chewier.
- → Can I use dark or milk chocolate chips instead of white chocolate?
Absolutely! You can substitute with milk or dark chocolate chips based on your preference. The white chocolate provides a nice contrast to the pink color, but any chocolate will work well.
- → How do I know when the cookies are done baking?
The cookies are ready when the edges are set but the centers still look slightly soft and underbaked. They will continue to firm up as they cool on the baking sheet, resulting in a perfect chewy texture.
- → How should I store these cookies?
Store the cooled cookies in an airtight container at room temperature for up to one week. You can also freeze them for up to three months—just thaw at room temperature before serving.
- → Can I make the dough ahead of time?
Yes, you can prepare the dough and refrigerate it for up to 3 days before baking. You can also freeze the dough balls and bake them directly from frozen, adding 1-2 extra minutes to the baking time.