 Save
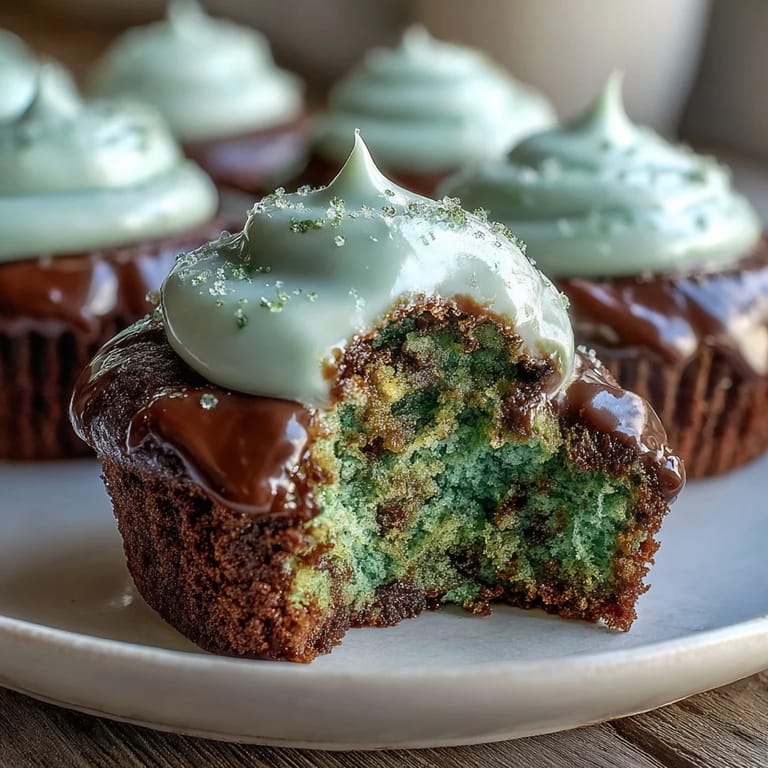
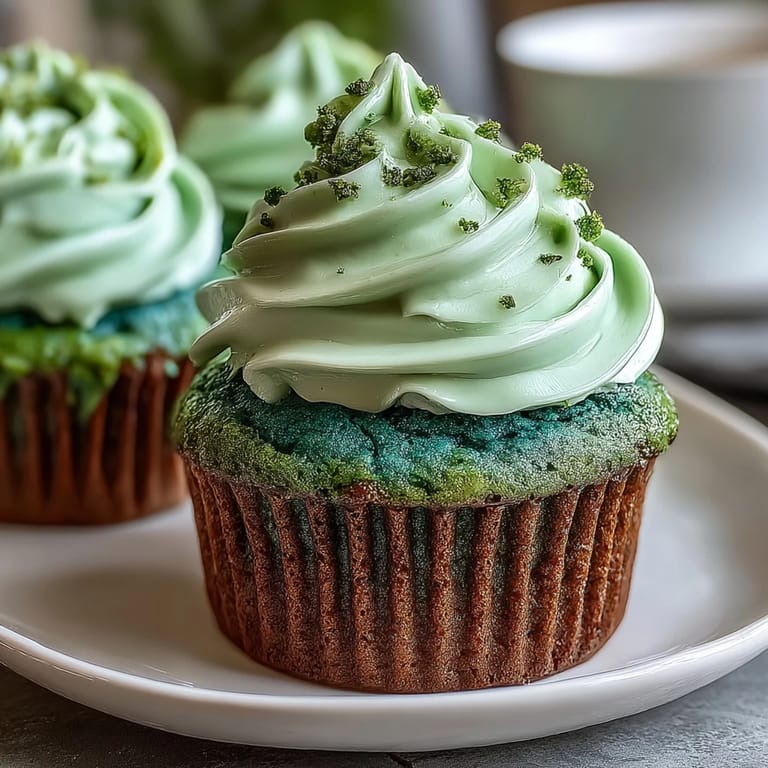
Save There's something about the week leading up to St. Patrick's Day that makes me want to bake something impossibly green. A few years back, I was at a friend's kitchen helping her prep for a party, and we got talking about how boring store-bought cupcakes felt for the occasion. She mentioned velvet cake—that Southern classic—and suddenly we were covered in cocoa powder and food coloring, trying to achieve the perfect shade of emerald. The result was so stunning that we've made these every March since, watching people's faces light up when they bite into that tender, slightly tangy crumb.
I'll never forget pulling these out of the oven during a surprise afternoon gathering—the kitchen smelled like cocoa and vanilla, warm and inviting in a way that made everyone stop talking mid-conversation. My sister took one bite and immediately asked for the recipe, which is how I knew they were keepers. Now whenever March rolls around, people text me asking if I'm making them, and I love that these little cakes have become part of how my friends and I mark the season.
Ingredients
- All-purpose flour: The foundation that keeps these cupcakes tender without being dense—measuring by weight rather than volume makes a real difference here.
- Granulated sugar: Sweetness and structure together, creating that moist crumb that makes velvet cakes so special.
- Unsweetened cocoa powder: Just enough to add complexity and a subtle richness without making them taste like chocolate cake.
- Baking soda and baking powder: The soda reacts with vinegar to create lift, while the powder ensures even rising throughout.
- Buttermilk: Brings tanginess and tenderness—don't skip it or substitute with regular milk.
- Vegetable oil: Keeps the crumb incredibly moist compared to butter, which is why this recipe relies on it.
- Eggs: Must be room temperature so they incorporate smoothly and add moisture without curdling.
- Vanilla extract: The subtle backbone that ties everything together without overpowering the delicate flavor.
- White vinegar: Works with the baking soda to create a gentle lift and adds a barely-there tang that makes the frosting pop.
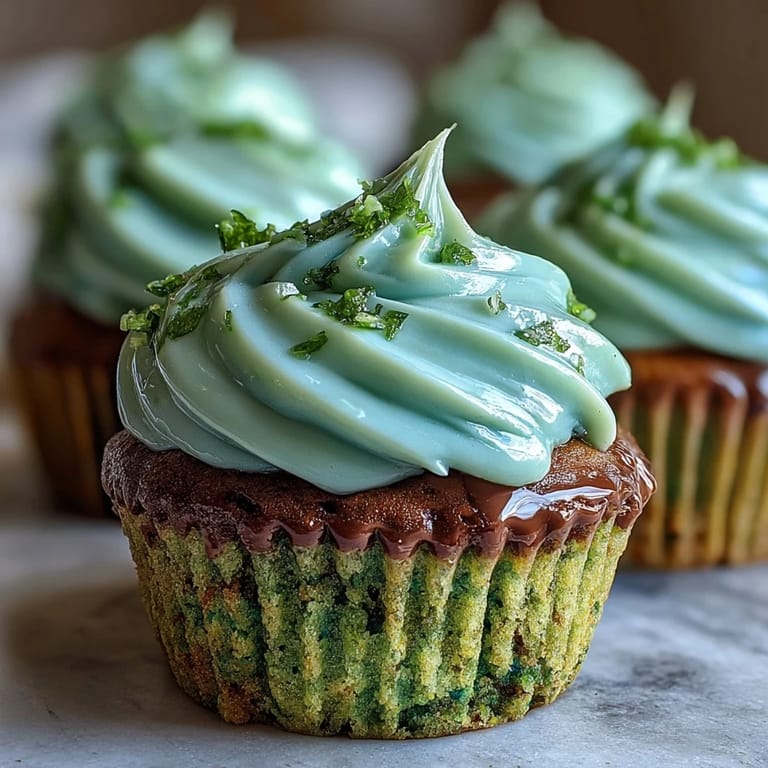
- Green gel food coloring: Gel is far superior to liquid for achieving that vibrant emerald without watering down the batter.
- Cream cheese: Softened properly, it creates the tangiest, smoothest frosting that feels like a revelation on top of these cupcakes.
- Unsalted butter: Softened and beaten with cream cheese, it creates a frosting that's silky without being greasy.
- Powdered sugar: Sifting it prevents lumps and ensures the frosting stays smooth and spreadable.
- Salt: A pinch in the frosting brings out the tang of the cream cheese and balances all the sweetness.
Tired of Takeout? 🥡
Get 10 meals you can make faster than delivery arrives. Seriously.
One email. No spam. Unsubscribe anytime.
Instructions
- Get your oven ready:
- Preheat to 350°F and line your muffin tin with cupcake liners—this prevents sticking and makes for cleaner presentation. Having everything prepared before you start mixing means you won't be rushed once the batter comes together.
- Build the dry ingredients:
- Whisk together flour, sugar, cocoa powder, baking soda, baking powder, and salt in a large bowl until everything is evenly distributed. This step ensures the leavening agents are spread throughout so each cupcake rises evenly.
- Combine the wet mixture:
- In a separate bowl, whisk buttermilk, oil, eggs, vanilla, vinegar, and green food coloring until the batter is smooth and vibrantly green. The color should be bold enough to shine through after baking, so don't be shy with the gel coloring.
- Bring it together gently:
- Pour the wet ingredients into the dry and stir until just combined—overmixing develops gluten and creates a tough, dense cupcake instead of the tender velvet texture you're after. A few small streaks of flour are absolutely fine and actually preferable to an overworked batter.
- Fill the liners:
- Divide batter evenly among the cupcake liners, filling each about two-thirds full so they have room to rise without overflowing. Using a small ice cream scoop makes this process even and ensures consistent baking.
- Bake until done:
- Place in the oven for 18 to 20 minutes—a toothpick inserted into the center should come out clean with no wet batter clinging to it. The tops should look set but still feel slightly tender when you gently press them.
- Cool completely:
- Let cupcakes cool in the tin for a few minutes, then transfer to a wire rack until they reach room temperature. Frosting warm cupcakes will melt the frosting, so patience is essential here.
- Make the frosting:
- Beat softened cream cheese and butter together until smooth and creamy, scraping down the bowl frequently to ensure everything is evenly combined. Gradually add sifted powdered sugar and mix well after each addition to prevent lumps.
- Finish the frosting:
- Stir in vanilla and a small pinch of salt, mixing until fully incorporated and the frosting is light and fluffy. This final touch of salt makes the tang of the cream cheese sing.
- Frost and decorate:
- Once cupcakes are completely cool, frost generously using a piping bag for height or a spatula for a more rustic look. Top with green sprinkles, shamrock candies, or even a dusting of green sugar to complete the festive appearance.
 Save
Save There's a quiet joy in watching someone take that first bite and instantly smile at the unexpected tang of cream cheese frosting against the tender, subtly spiced cake. These cupcakes have a way of making a celebration feel intentional and special, like you went out of your way to create something memorable—even though they're honestly quite easy to pull together.
Making These Ahead
One of my favorite things about this recipe is how well it adapts to being made in stages, which is essential if you're hosting or bringing these somewhere. I usually bake the unfrosted cupcakes a full day ahead, store them in an airtight container at room temperature, and frost them just a few hours before serving so the frosting stays fresh and creamy. If you need even more advance notice, you can freeze unfrosted cupcakes for up to two weeks—just thaw them overnight in a sealed container and frost as usual.
Flavor Variations Worth Trying
The beauty of this recipe is how adaptable the frosting can be once you master the base. I've added citrus zest—orange or lemon work beautifully—which cuts through the richness and adds a sophisticated brightness. Some friends have mixed in a tiny amount of whiskey or Irish cream to the frosting for a grown-up version, while others add a hint of almond extract to the cupcake batter itself. The cream cheese frosting is also forgiving enough to tint with a touch more green if you want it to match the cupcakes, or keep it white for that striking green-and-white contrast.
Storage and Pairing Ideas
These cupcakes are best enjoyed within two or three days, though the unfrosted ones keep longer if you need to spread out your baking timeline. They pair wonderfully with Irish coffee, hot chocolate, or even a crisp cup of tea—the tangy frosting complements all of those flavors without feeling too heavy. Here are a few more serving ideas that have worked beautifully over the years:
- Serve them at room temperature so the frosting is soft and the cake is moist, not chilled firm.
- If you're bringing them somewhere, frost them just before you leave or transport unfrosted and frost upon arrival for the best texture.
- A dusting of green pearl sugar or edible glitter on top of the frosting adds an extra festive shimmer that catches the light.
 Save
Save These green velvet cupcakes have quietly become one of my favorite reasons to celebrate March, and I hope they become yours too. There's something special about baking something that makes people happy and surprised in equal measure.
Common Recipe Questions
- → What gives the cupcakes their green color?
The vibrant green hue comes from gel food coloring, which provides a rich, consistent color without altering the batter's texture.
- → Can these cupcakes be made ahead of time?
Yes, unfrosted cupcakes can be stored in an airtight container for up to one day before frosting to maintain freshness.
- → How is the texture of these cupcakes achieved?
The combination of buttermilk and cocoa powder creates a moist, tender crumb with a subtle chocolate undertone.
- → What is the purpose of adding vinegar to the batter?
White vinegar reacts with baking soda to help the cupcakes rise and enhances the velvet texture and tenderness.
- → How can I add extra flavor to the frosting?
Incorporating a hint of orange or lemon zest into the cream cheese frosting adds a refreshing citrus twist.