 Save
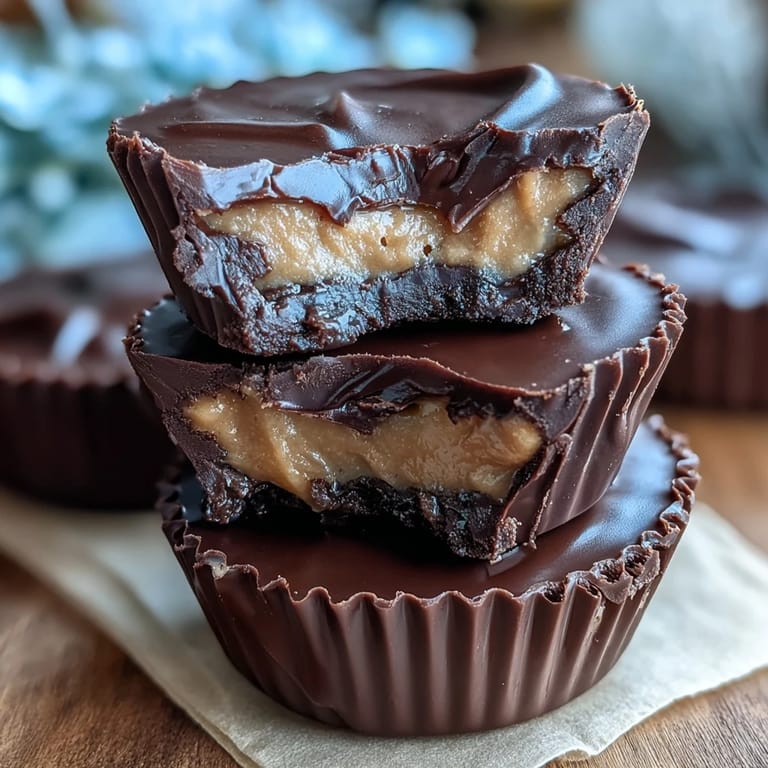
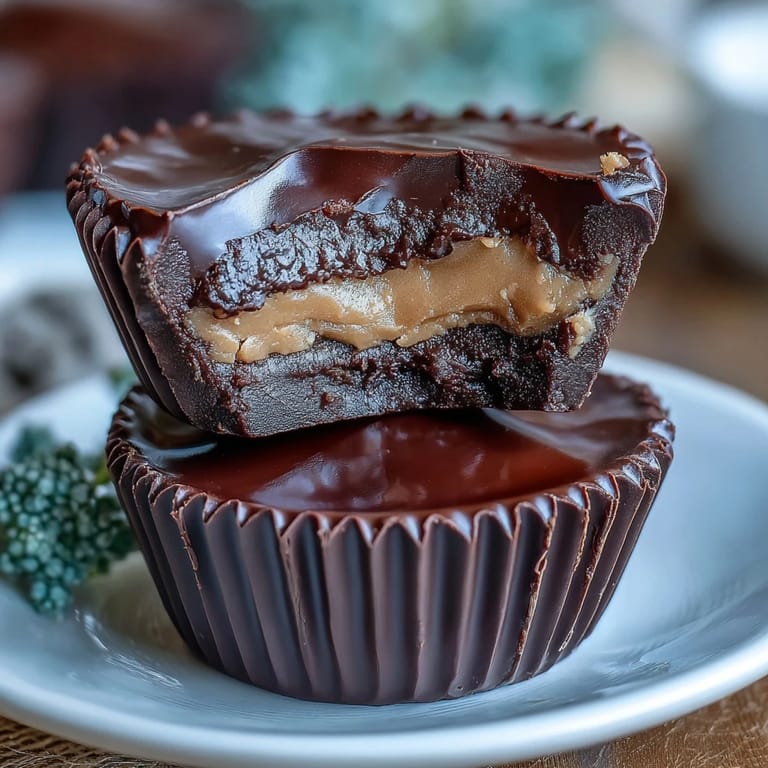
Save There's something undeniably magical about biting into a homemade peanut butter cup—the way the rich dark chocolate shell cracks gently to reveal a creamy, lightly salted peanut butter filling that melts on your tongue. These Homemade Reese's Peanut Butter Cups with Dark Chocolate bring that nostalgic candy aisle favorite into your kitchen, but with a grown-up twist. Using quality dark chocolate with at least 70% cocoa and pure, unsweetened peanut butter, you'll create a treat that's both indulgent and surprisingly simple to make. In just 30 minutes of active time—plus a quick chill in the fridge—you'll have a batch of 12 glossy, professional-looking cups that rival anything store-bought. Whether you're preparing them for a special occasion, gifting them to a chocolate-loving friend, or simply satisfying your own sweet tooth, these cups deliver the perfect balance of sweet, salty, and deeply chocolatey in every bite.
Save The secret to perfect homemade peanut butter cups lies in the quality of your ingredients and the layering technique. Unlike mass-produced versions, making these at home allows you to control exactly how much sugar goes into the filling and lets you choose a dark chocolate that truly speaks to your palate. The addition of a touch of vanilla extract and fine sea salt elevates the peanut butter filling from simple to sublime, while the optional coconut oil in the chocolate creates that signature glossy finish and satisfying snap. The process itself is meditative and fun—watching the layers come together in the mini muffin tin is deeply satisfying, and the hardest part is waiting for them to set in the fridge before you can enjoy the fruits of your labor.
Ingredients
Tired of Takeout? 🥡
Get 10 meals you can make faster than delivery arrives. Seriously.
One email. No spam. Unsubscribe anytime.
- Chocolate Layer: 250 g (9 oz) dark chocolate (70% cocoa or higher), chopped, and 1 tbsp coconut oil (optional, for smoother texture)
- Peanut Butter Filling: 120 g (½ cup) creamy peanut butter (unsweetened, unsalted preferred), 2 tbsp unsalted butter (softened), 60 g (½ cup) powdered sugar (sifted), ¼ tsp fine sea salt, and ½ tsp vanilla extract
Instructions
- Step 1: Prepare the Muffin Tin
- Line a 12-cup mini muffin tin with paper liners.
- Step 2: Melt the Chocolate
- Melt the dark chocolate and coconut oil together in a heatproof bowl set over a pan of simmering water, or microwave in short bursts, stirring until smooth.
- Step 3: Form the Chocolate Bases
- Spoon about 1 teaspoon of melted chocolate into the bottom of each muffin liner. Tilt or use a spoon to coat the sides slightly. Chill in the freezer for 10 minutes to set.
- Step 4: Make the Peanut Butter Filling
- Meanwhile, in a medium bowl, mix peanut butter, butter, powdered sugar, salt, and vanilla extract until smooth and thick.
- Step 5: Add the Filling Layer
- Roll about 1 teaspoon of the peanut butter mixture into a ball, flatten slightly, and place onto the set chocolate bases. Gently press down to create an even layer, leaving a small border around the edge.
- Step 6: Top with Chocolate
- Spoon the remaining melted chocolate over the peanut butter layers, covering completely. Tap the tin gently to smooth the tops.
- Step 7: Chill Until Set
- Chill in the refrigerator for at least 30 minutes, or until fully set.
- Step 8: Serve and Store
- Remove cups from liners and serve. Store in an airtight container in the refrigerator for up to 1 week.
Zusatztipps für die Zubereitung
For the smoothest peanut butter filling, make sure your butter is truly softened to room temperature before mixing—this ensures it blends seamlessly with the peanut butter and powdered sugar. If your melted chocolate begins to thicken or harden while you're working, simply rewarm it gently. When forming the chocolate bases, don't worry about perfection—a rustic, slightly uneven edge adds homemade charm. To prevent the peanut butter layer from mixing with the top chocolate layer, make sure the filling discs don't quite reach the edges of the cup. Finally, resist the temptation to skip the chilling steps; they're essential for achieving clean layers and that satisfying snap when you bite through the chocolate shell.
Varianten und Anpassungen
These peanut butter cups are wonderfully versatile and invite experimentation. For a vegan version, simply swap the unsalted butter for a plant-based alternative and ensure your dark chocolate is dairy-free. If peanut allergies are a concern, almond butter or cashew butter make excellent substitutions, each bringing their own unique flavor profile. For an extra indulgent twist, try adding a thin layer of raspberry jam or a sprinkle of crushed pretzels between the chocolate and peanut butter layers. If you prefer milk chocolate, feel free to use it instead of dark—just be aware the cups will be sweeter. You can also make these in regular-sized muffin tins for larger treats, simply adjusting the quantities accordingly and extending the chilling time slightly.
Serviervorschläge
These homemade peanut butter cups shine in so many serving scenarios. Present them on a simple white plate as an elegant finish to a dinner party, dust them lightly with cocoa powder for a sophisticated touch, or pile them into a decorative tin for a heartfelt homemade gift. They pair beautifully with a hot cup of freshly brewed coffee, the bitterness of the dark chocolate complementing the coffee's bold notes, or serve them alongside a cold glass of milk for a nostalgic afternoon treat. For a fun dessert board, arrange them with fresh strawberries, salted nuts, and a selection of other dark chocolates. During the holidays, wrap individual cups in colorful foil and tie them with ribbon for charming stocking stuffers. However you choose to serve them, these cups are sure to impress.
 Save
Save Making your own peanut butter cups at home is more than just a recipe—it's a small act of kitchen alchemy that transforms simple pantry staples into something truly special. Each bite delivers that perfect combination of textures and flavors: the firm snap of dark chocolate giving way to a creamy, slightly salty center that's neither too sweet nor too rich. These cups prove that you don't need fancy equipment or professional training to create confections worthy of a chocolatier's display case. They're proof that the best treats are often the ones made with your own hands, using ingredients you can pronounce and techniques you can master in a single afternoon. So gather your chocolate, your peanut butter, and your mini muffin tin, and discover just how rewarding homemade candy-making can be. Your future self—and anyone lucky enough to receive these as a gift—will thank you.
Common Recipe Questions
- → What type of chocolate works best for these cups?
Dark chocolate with 70% cocoa or higher ensures a rich, intense flavor and smooth texture, complementing the peanut butter filling well.
- → Can I make these cups vegan?
Yes, substitute dairy butter with a plant-based alternative and choose dairy-free dark chocolate to keep them vegan-friendly.
- → How do I prevent the chocolate from seizing when melting?
Melt chocolate gently over simmering water or in short microwave bursts, stirring frequently to maintain smoothness.
- → Is it necessary to chill the cups before serving?
Chilling for at least 30 minutes ensures the chocolate sets firmly, giving the cups a clean texture and easy handling.
- → Can I add other nut butters for variation?
Almond or cashew butter can be used as alternatives, offering a unique flavor twist while maintaining creamy texture.