 Save
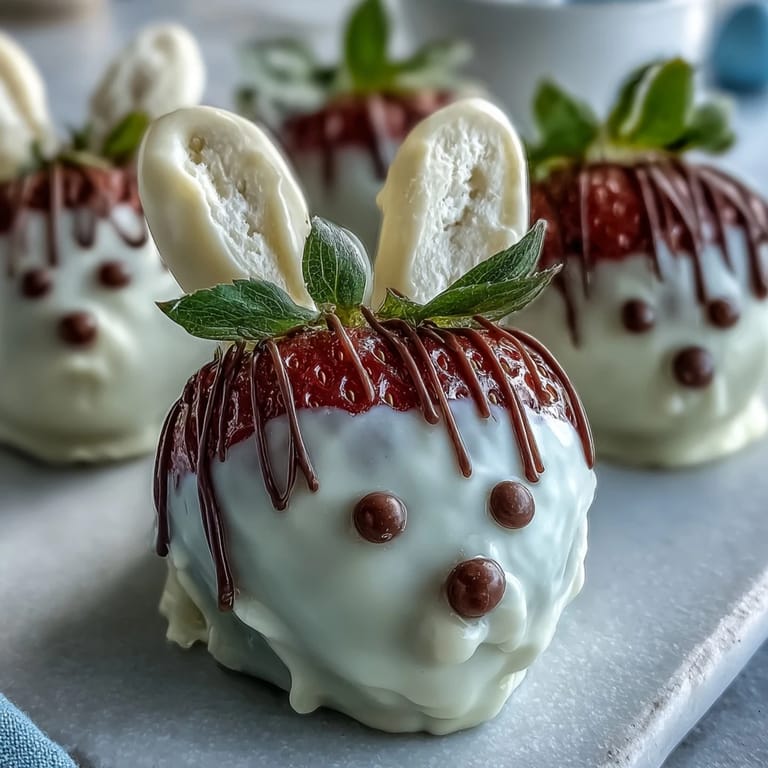
Save My daughter called them "strawberry bunnies" the moment she saw them on my kitchen counter, and I knew right then this recipe would become an Easter tradition. There's something magical about turning simple strawberries into little creatures with personality, and watching her eyes light up made every tiny decoration worth the effort. The beauty of this project is that it requires almost no baking skills, just patience and a willingness to get a little messy with melted chocolate. I've made these for three Easters now, and each time someone asks if I bought them from a fancy bakery. The honest answer is always no, they're easier than you'd think.
Last Easter, I made these while my nephew sat on the kitchen stool narrating every step in his four-year-old voice, insisting the marshmallows were "real bunny ears." When he helped stick the first pair onto a strawberry, his concentration was so serious you'd have thought he was performing surgery. By the time we finished all twelve, he'd named each bunny and created elaborate backstories about where they lived and what they ate. Those bunnies barely made it to the dessert table that afternoon because he kept sneaking them when he thought I wasn't looking.
Ingredients
- Strawberries: Use the largest, firmest ones you can find, because they hold decorations better and look more substantial once coated.
- White chocolate: The base that makes these bunnies what they are; quality matters here since there's nowhere for bad chocolate to hide.
- Dark chocolate: A thin drizzle creates whiskers and mouths that give each bunny personality and flavor contrast.
- Mini marshmallows: Cut in half, they become perfect floppy ears when the chocolate is still tacky enough to hold them.
- Edible pink food gel or pink candy melts: These tiny details transform abstract shapes into actual bunny faces.
- Candy eyes or mini chocolate chips: The souls of your strawberry creatures; don't skip this step.
Tired of Takeout? 🥡
Get 10 meals you can make faster than delivery arrives. Seriously.
One email. No spam. Unsubscribe anytime.
Instructions
- Prep your station:
- Line your baking sheet with parchment paper and wash the strawberries completely, then pat them very dry with paper towels. Moisture is the enemy of chocolate coating, so spend a moment here.
- Melt the white chocolate:
- Use a double boiler or microwave in short 30-second bursts, stirring between each one until it's completely smooth. The goal is melted, not scorched.
- Coat the strawberries:
- Dip each strawberry upside down into the white chocolate, then flip and place on parchment. Work quickly because you need the coating to still be soft when you add ears.
- Attach the ears:
- Cut each mini marshmallow in half and press two halves onto the top of each strawberry while the chocolate is still tacky. If the chocolate hardens too much, it won't hold them.
- Add the details:
- Use a toothpick to dab pink food gel inside each ear and a tiny dot for the nose, then place candy eyes or chocolate chips where eyes should go.
- Create personality:
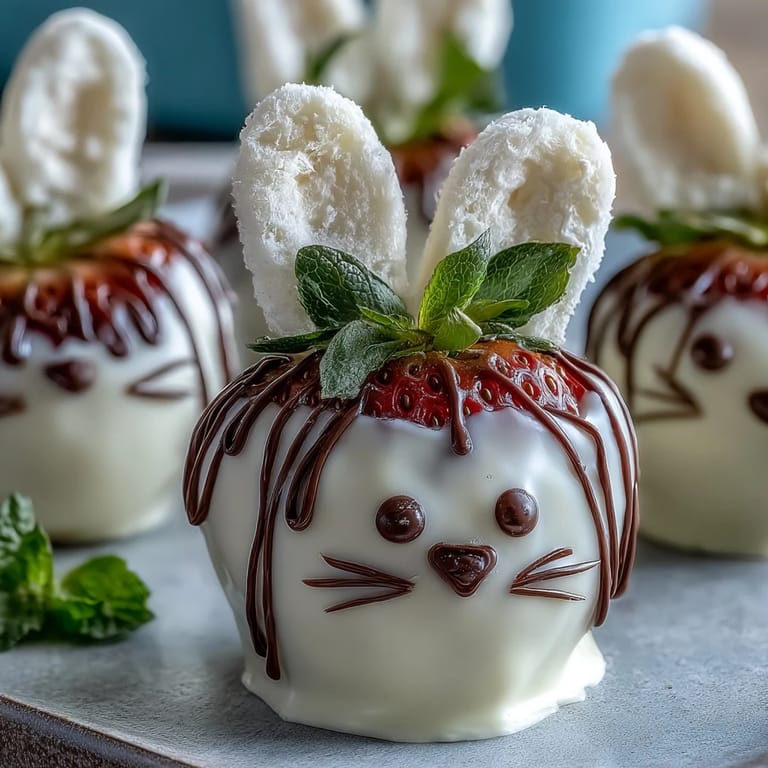
- Melt the dark chocolate and either drizzle it over the bunnies or pipe on whiskers and smiles. This is where they stop being decorated strawberries and become actual characters.
- Set and chill:
- Refrigerate for 10 to 15 minutes until everything is firm, then serve them cold.
 Save
Save These bunnies became something more than dessert the year my partner came home early and found me photographing them with way too much focus, trying to get one silly picture for my food journal. He laughed and said they looked like they had personalities, and that's when I realized that's exactly what I'd been trying to do all along. It wasn't about making something fancy or perfect; it was about creating little edible characters that would make people smile before they even took a bite.
The Secret to Picture-Perfect Bunnies
The difference between bunnies that look handmade and bunnies that look intentionally crafted comes down to symmetry and confidence. Place both ears at the same angle and height, and they'll immediately look more polished. I learned this after my first batch looked like some bunnies had just woken up on one side of their face. Also, don't be timid with the dark chocolate drizzle or the pink details; wishy-washy markings make them look uncertain, but clear eyes and mouths give them personality.
Scaling This Recipe for Crowds
Once you've made a batch of twelve, you'll realize this is actually a perfect amount for a small Easter table or family gathering. If you need more, the recipe scales beautifully, just melt extra chocolate in the same proportions. The time investment is mostly the assembly, which is actually more enjoyable when you settle in with a friend or family member and make it a production together.
Flavor and Serving Ideas
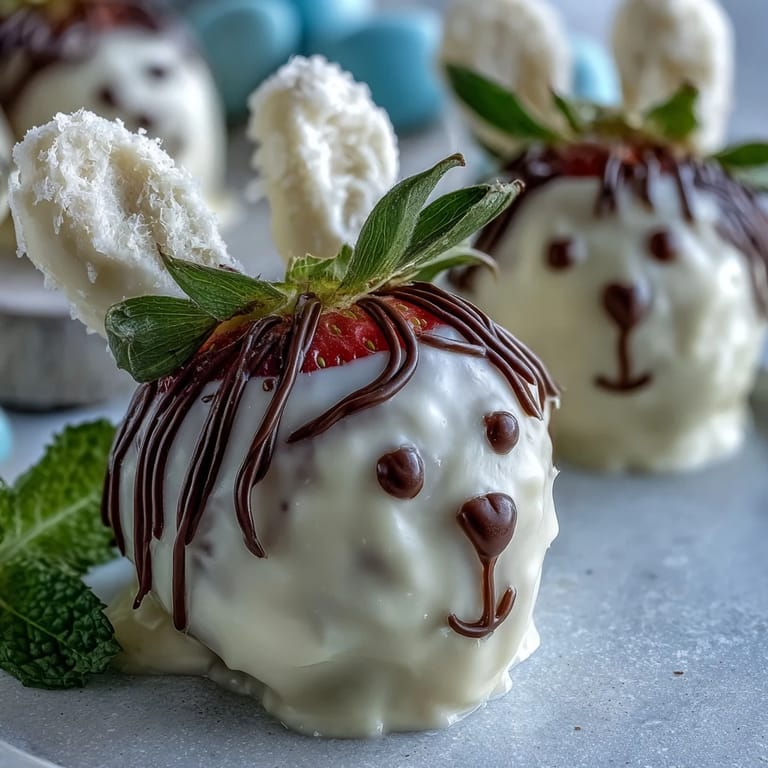
These taste best served cold, straight from the refrigerator, where the white chocolate coating snaps slightly when you bite into it and gives way to the fresh strawberry inside. The dark chocolate drizzle adds depth that keeps them from being too sweet, which is why they never feel like overkill even for Easter celebrations. Serve them on a pretty plate, maybe scattered with a few extra fresh strawberries, and people will think you spent all day in the kitchen.
- Make them the night before and store in the refrigerator in an airtight container up to 24 hours.
- Experiment with different eye styles, from classic chocolate chips to actual edible googly eyes for extra whimsy.
- Keep extra dark chocolate in a squeeze bottle for last-minute whisker additions if any bunnies look too serious.
 Save
Save These little strawberry bunnies have taught me that dessert doesn't need to be complicated to be memorable. They're the kind of recipe that makes you feel creative without requiring any actual skill, and that's exactly why people keep asking you to make them year after year.
Common Recipe Questions
- → What type of chocolate works best for coating?
White chocolate melts smoothly and provides a creamy coating, while dark chocolate is ideal for decorative drizzles due to its contrasting color.
- → How do I prevent strawberries from getting soggy?
Make sure to thoroughly dry strawberries before dipping to ensure the chocolate adheres properly and prevents sogginess.
- → Can marshmallows be replaced for allergens?
Yes, vegan or allergen-free marshmallows can be used, or small candy shapes can replace marshmallow ears.
- → What’s the best way to achieve thin chocolate drizzle?
Melt dark chocolate and use a piping bag or a fork to lightly drizzle over the coated strawberries for delicate lines.
- → How should I store these strawberry bunnies?
Store them chilled in the refrigerator to keep the chocolate firm and maintain freshness before serving.
- → Can I prepare these in advance?
Yes, prepare and decorate ahead, then chill just before serving for best flavor and texture.